 |
 |
Silver Balloon Solar Cooker
The Solar Cooker Built To Travel

The Silver Balloon Solar Cooker Quick Stats...
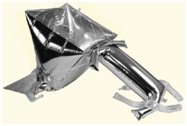
The Silver Balloon Solar Cooker comes to us from California Sunlight. They created a new take on solar cooking that they wanted to share with the world. It is touted as "The World's Most Compact, Most Lightweight Solar Cooking Solution".
- Ultralight, Ultra-compact, and Ultra-portable – a solar oven that can easily travel with you, and be there for you in a calamity if you have to run
- Funnels and concentrates sunlight internally, with temperatures up to 350F (176C) – highly efficient heating, and no worry about eye injuries or fire!
- No assembly required – simply inflate and point in the direction of the sun
- We’ve eliminated weaknesses: No glass or mirrors to break; No metal parts or screws to rust, bend, or break; No cardboard to bend or to protect from moisture; No plastic to break or plastic coating to ruin the taste of your food
 |
 |
Pots and Pans To Use In The Silver Balloon Solar Cooker
Silver Balloon Solar Cooker Additional Information:
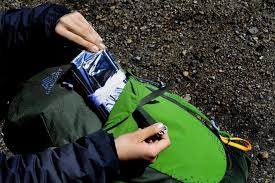
- Ultralight (6 ounces) and Ultra-compact means Ultra-portable when you’re hauling it on your back
- Heats to 350F – cook, boil (or pasteurize) water to make it safer to drink
- Carry less fuel and save your fuel for night

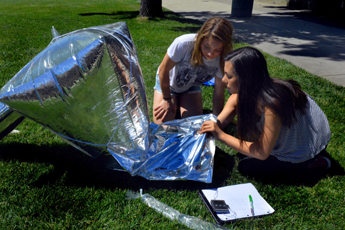
We just received our first Silver Balloon Solar Cooker in September 2016. The product is new to the market and California Sunlight contacted us to help bring their product into the solar cooking community. We always do a thorough review of the cookers presented to us to give you a non-biased opinion on each solar cooker.
So far I am impressed with how lightweight and easy this solar cooker is to carry with you. It can easily fit into a backpack or even a pocket. It is small and very easy to take on camping, hiking and backpacking adventures.
Easy Assembly:
We received the box with all pieces and parts were there and nothing was missing. The box is very attractively packed and compact to a small volume.
The assembly instruction pages were simple to follow and fairly quick. You would need to have the pump or really strong lungs to inflate the balloon but other than the blowing up, assembly was super simple. It can easily be assembled by one person and more people could take turns pumping up the unit.
Everything you need to assemble the unit is included in the packaging. No additional tools were required. The quality of the cooker and the assembly parts was done well and everything fits together nicely.
All together it took about 30 minutes to completely assemble the cooker and I expect it will take much less time on subsequent assemblies. It is built to be reused time after time.
User Friendly:
Once the unit was assembled, we put it to the test. It was easy to put together the cook package which consists of the pot, oven bag and heat retention disk. The door of the oven is large and easy to fit any size pot or cooking receptacle into. The door opens wide and has a lot of space inside for holding the pot in place under the window.
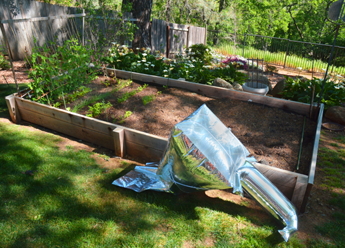
Aiming the cooker to its best position facing the sun is very simple. The I beam on the front elevates the silver balloon and is easy to hold in place with the weights. We used water but you could easily use sand or gravel. Water seemed best for multiple uses as it would do the least damage to the bags. Once it was in place and the weights put on, the cooker was fairly stable. The wind was a factor for us and I could see it being a problem on a really windy day as the cooker is easily pushed around by strong winds. I would not recommend cooking with it on a windy day.
To move the unit around is very simple. It easily deflates/inflates and once inflated is super lightweight like a balloon and moving it around is effortless.
Effectiveness:
The effectiveness or potency is about on par with what we expected. The advertised maximum cooking temperature is 350 F but we did not achieve those temperatures. We were not able to get water to boil in the 30 minutes we had it focused in. We did have occasional clouds pass overhead and the wind pushed it a little but for the most part we were diligent in keeping it focused on the sun.
The sunlight passes through the clear face and down into the window at the bottom. It has a decent sized sunlight footprint when full blown up of about 28" X 18" or so. If held steady, the sunlight is directed to the window and thus onto the black surface of the cooking package. I wish the window was slightly larger and could capture a little more sunlight. That adjustment may make it reach higher temperatures and longer cook times.
We tried warming up a frozen burrito and it did that just fine. We tried boiling water and it took over 30 minutes so we stopped the test and ended up with very warm water. I imagine it could have come to a boil if given more time.
Summary:
As I mentioned earlier the quality of materials and exactness of the package is good quality.
The cooker is invariably the lightest weight cooker we have ever reviewed and thus the perfect solution for small and portable solar cookers.
Once you purchase the cooker you do not need to purchase additional items and it can be used over and over again. It seems like a great solution to have in a bug-out-bag.
We hope to see this cooker in use and get some more user reviews by those of you who are anxious to try the Silver Balloon Solar Cooker!
5 Tips and Tricks from the inventor Bing Gu:
1. Do not over inflate balloon. If balloon is accidentally popped, use clear tape to repair it
2. Use provided oven bag tie to seal open end of oven bag. Tuck the end of the bag under the pan
3. Aim the large end of balloon toward the sun and "Position" as in the video below
4. Make sure the top of the cooking package is up against the small end of the balloon
5. Confirm sunlight reaches the cooking package unobstructed by the mylar sleeve or the balloon
Instructional Videos On How To Use the Silver Balloon Solar Cooker
FAQ Silver Balloon Solar Cooker
Do you own this same solar cooker?
How have you used this solar cooker in a unique or different way?
How have you improved this solar cooker and its capabilities?
Share with us and out site visitors...
SOLAR COOKER CATEGORIES
Panel Cookers
Box Cookers
Parabolic Cooker
Evacuated Cookers
Accessories
Discontinued CookersNew Financing Options available for purchase of Solar Cookers


