Salsa Sun Chicken
by Christa Upton
(South Dakota)

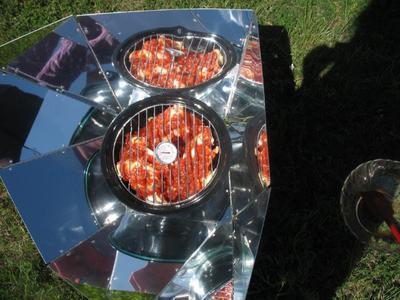
Chicken in Hot Pot with Thermometer
Recipe Eight in the Hot Pot
Salsa Sun Chicken
Prep:
Mix together:
1 2/3 c. of your favorite salsa
1 t. chili powder
1 t. cumin
Cut 3 leg-and-thighs into 6 pieces (or just use any six pieces of chicken).
9:45 am—preheat Hot Pot by setting up to face the sun (with lid on). Set timer for 15 minutes.
10:00 am—chicken pieces: arrange in Hot Pot, with thickest pieces toward the outside edges.
Pour salsa mixture over chicken.
These pieces of chicken are huge, so it’s filling the Pot more than I thought it would, but hopefully it will still work.
I wanted to use a thermometer to keep track of temperature, but I wasn’t sure how to make the thermometer stay ‘upright,’ so I came up with this plan:
After putting all food in, set round baking rack in top of cooker. Put thermometer in, touching the food (do not insert into meat yet) but not touching the Pot. The baking rack will hold thermometer head up for easy reading later. (Hey—now my baking rack is a multi-tasker!)
picture of raw chicken with baking rack and thermometer in Pot (below)
Cover, set up facing the sun, set timer for 60 minutes. You’re basically done except for adjusting to the sun and checking the temperature!
11:00 pm—adjust to sun, set timer for 60 minutes.
12:00 pm—check temperature without opening lid (can carefully jiggle pot to get condensation off lid).
If temperature is NOT up to 150 degrees Fahrenheit by now, for food safety, you need to quickly bring up the temperature and finish cooking with higher heat source. (To finish on the stove, put in large skillet or two, add 2 cups of water or chicken broth and/or more salsa if desired, heat on medium high until simmering, turn down heat and simmer until chicken reaches 165 degrees internal temperature—thermometer inserted into thickest part of meat but not touching bone.)
If at least 150 degrees, adjust to sun, set timer for 90 minutes.
1:30 pm—adjust to sun, set timer for 60 minutes.
Wow, by 2:00 ours was bubbling all over and too hot to register on the meat thermometer (which goes up to 190)! What fun this is! Very few clouds today, and again our altitude (3500 ft. above sea level) must be helping our northern latitude!
2:30 pm—check temperature (must still be at least 150 degrees or needs to be boosted with microwave and finished at higher heat), adjust to sun, set timer for 90 minutes.
4:00 pm—check temperature. If it has dropped below 150, just eat now! (smile) Oh, well, first make sure the chicken is done by inserting thermometer into thickest part of center piece of meat but not touching bone. It should read at least 165 degrees. If so, you’re good. Since it was at 150 degrees at 2:30, you know it hasn’t been under 150 degrees for more than 90 minutes, so it is good to eat, but not good to let it sit in the Pot much longer.
If it is still above 150, you are probably okay to let it ‘coast’ until a bit later supper (just don’t open the lid and keep an eye on the temp).
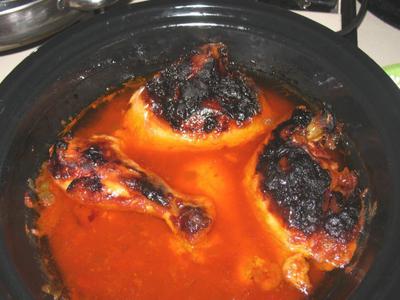
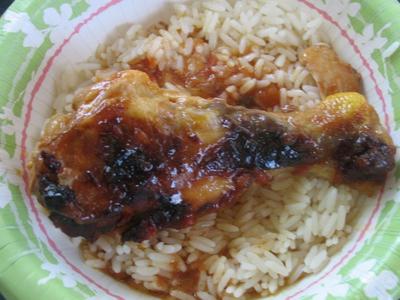
Hey, who needs a grill for that nice, charred flavor! Can you believe it? The chicken skin tastes incredible and is even crispy in places! How did it do that? The chicken is juicy, tender and falling off the bone, spicy—yum!
Plus a storm came through (a hailstorm, no less), so we brought the Pot in shortly before 5:00 (kept the lid on) and STILL let it coast until after 6:00! At 6:00, it was still a wonderful 175 degrees. Really amazing.
Take meat off bone, or serve pieces and let everyone take their own off the bone. (smile)
Serve on rice or tortillas or corn chips with sour cream, refried beans, and a side salad of greens if desired.
If you don’t eat all the juices with this meal, the juices would make an incredible soup base for lunch the next day. (Chill juices. Take fat off the top. Use some of the fat to cook down some onions, celery, and carrots. Add juices, a little water (if desired/needed), veggies, meat, pasta, whatever you like!)
SOLAR COOKER CATEGORIES
Panel Cookers
Box Cookers
Parabolic Cooker
Evacuated Cookers
Accessories
Discontinued CookersNew Financing Options available for purchase of Solar Cookers


